Monday, August 31, 2009

Sun and Moon Earrings


Sun and Moon Earrings
These are the notes I took for a friend, not a true pattern, so please bear with me and PLEASE feel free to ask questions!

They are really pretty simple and once you get the thread onto the earring, it’s not much different than any other crochet. I used two hoops of different metal-tone, with the silver being slightly larger due to the optical illusion of size given to the Sun earring with the stitches being outside the circle. The Moon would seem puny in comparison.

You’ll work with the right side facing you, even when you turn the work, it just seems to work out like that. I used a size B hook and size 5 crochet thread. Make a slip stich just like you always would but with a tail at least two inches long, then slip the hook inside the circle and under to catch the thread around the earring. Pull up a loop, catch the thread and pull through to make the first single crochet stitch.(You’re sort of treating the earring like it’s your foundation chain, and you’re making a row of single crochet on it.) Continue in this way until you have the desired umber of stitches. (There may be another or better way to do this. This is what I stumbled on in my experimenting and it works, so I keep using it. :))

For the Sun, I used 40 stitches, but any number divisible by five works; I’ve used this pattern with as few as 15 stitches and as many as 180. It always looks great. :) You want to use enough stitches that they are close on the earring, but not so many that the stitches on top are curving around themselves. After you get your first row onto the earring, ch one and turn then begin this pattern going back the other way: sc, dc, tc, dc, sc. Don’t be afraid to pull your stitches tight. If you allow the second dc and sc to go loose, you don’t get that nice bump on the surface. Once you get to the end, break thread, pull through the last loop and tie this end to the beginning tail. Snip close and superglue the knot for security.

For the Moon, you are going to begin the same way, only you don’t want enough stitches to cover the earring. I made enough to cover half the hoop in the same manner as the Sun. When you get to the end, turn work (do not ch 1 before turning, this creates a little bump in the end where you want it to be smooth), sk next st and sl st for the next four stitches. From here you will sc decr across until the last four or three stitches, depending on how many you have at the end. When you get to the end of that row, repeat it one more time. Your stitches will be very tight and you’ll want to begin moving them to the side of the hoop and finally toward the inside. Once you complete the third row, finish off and weave in ends. Slide the stitches to the inside of the hoop (this is easiest if you bunch them up first), then slide one end all the way to the top of the hoop and spread the rest out along the hoop to create the crescent shape. The thread will be taut. Try to get the stitches spaced evenly and the shape of the Moon will follow. Be sure to superglue your knots for security once you’re happy with the shape.
Please don’t sell this pattern or products made from this pattern, or redistribute this pattern. Thanks!

BB and thank you!!
~Jeannie

Saturday, August 15, 2009

Oh, No! Streelers!


Here's a free pattern for all you HP hookers out there. By that, of course, I mean Harry Potter fanatics that also crochet. :) I developed and debuted this pattern on my group on Ravelry, Harry's Happy Hookers. It's for a Streeler, which is a magical creature from the world of Harry Potter. Check out the links for more info.

On to the pattern!!

Oh, No! Streelers!

Streelers are giant magical snails from the world of Harry Potter. They have many unique properties that make them interesting, but their color-changing nature is what makes them fun to stitch up!

Materials List:
 as many scraps of variegated WW yarn as you can get your hands on and want to change through during the project. (I used four different colors for the dark Streeler and three for the light),
 a G hook,
 some stuffing,
 eyes of your choice (optional, I didn’t use any in my sample),
 a tapestry/wool/darning needle

Note: I don’t usually join rounds, so work in a spiral unless otherwise noted. A stitch marker is helpful to mark the 1st st in each row, so you know when to stop.

With color A:
Row 1: Ch 2, 6 sc in 2nd ch from hook. (6)
Row 2: 2 sc {aka sc incr} in each st, around (12)
Row 3: (sc incr in next st, 1sc) around (18)
Row 4: (sc incr in next st, 2 sc) 5 times, then sc and dc in same stitch, dc, tc (24)

After Row 4:

Photobucket

* * From here you will begin to work in rows back and forth, as with a flat piece
Row 5-8: sc in every stitch (24), ch 1 at end of row, turn (after row 6, I changed to a new yarn)

After Row 8, the other side is completely open, with no spiraling back or anything:

Photobucket

From the open side, after Row 8:

Photobucket

* * From here, you will being to work in a spiral again, moving from this outside edge, toward the center.
Row 9: ch 4, dc, dc, sc around (24)

The beginning of Row 10, to start decr, you place your hook in the top of the ch 4 and just continue in a spiral:

Photobucket

Row 10: (sc decr, 2 sc) around (18)
Row 11: (sc decr, 1 sc) around (12)
Row 12: sc decr around (6)
Break yarn with a tail long enough to weave through the last six stitches to pull tight. Weave in ends or pull to middle and lightly stuff the first piece, just enough to give it shape, but not distend it or cause the stitches to stretch and show the stuffing.

Complete, first side:

Photobucket

Complete, other side:

Photobucket

Complete, from the bottom, shows opening:

Photobucket


With Color B (or C if you changed colors halfway through the first piece): Ch 2, in 2nd st from hook, 6 sc (again no joining, just spirals for me) (6)
Row 1: (sc incr, 1 sc) around (9)
Row 2-12: sc around (9)
It is easiest to stuff this as you go along, but remember to not stuff too tightly.
Row 13: (sc incr, 2 sc) around (12)
Row 14: (sc incr, sc) around (18)
Row 15: sc around (18)
Row 16: (sc decr, sc) around (12) If you are using safety eyes, place them now. Don’t forget to stuff!
Row 17: sc decr around (6)
Break yarn, leaving a long enough tail to weave through last six st and pull tightly to close. Weave in ends.

Both pieces, with ends woven in and stuffed.

Photobucket

Next, we will start putting the pieces together. First, sew the shell onto the back of the body, like this:

Photobucket

Continue sewing around the shell. When you get to the head, you will bend the head back, creating a curve in the body, and sew a little higher up on the shell to pull the head up.

Photobucket

When you’re done sewing it on, it should look like this:

Photobucket

Next, we are going to add a foot to our little guy. With your final color of yarn, you will pick up stitches along the bottom of the body. To determine where to pick up stitches, turn your toy over and find the center line of stitches; you will pick up stitches on either side of that line. To find where to start from the top, count down four rows from the first increase row in the head.

Photobucket

You will sc 9 stitches onto the body, going toward the tail, ch one, then sc 9 on the outside line of stitches, moving back toward the head. Ch 1, turn work. Working back along this line of stitches, work 2 hdc in each st, including the ch 1 in the middle. Here is how it looks once you are finished picking up stitches and ready to start with the hdc:

Photobucket

And here it is once you are finished with the foot, from the bottom:

Photobucket

Here’s our little guy so far!

Photobucket

One last step and he’s (or she’s) complete! Taking a piece of scrap yarn, ch 10 and tie of, clipping the ends close to the knots. Then, thread your hook between two stitches on the top of the head:

Photobucket

Use your hook to thread that chain through the top of the head to make his little antennae.

Photobucket

Finished! These little guys are so quick and fun! The bottom Streeler is made with sc around the foot. It’s up to you; both will make it stand.

Photobucket

Please note: I am in no way affiliated with JK Rowling or the world of Harry Potter (thought I wish I were!), and I am not profiting from this pattern, so please be kind and don’t use this pattern to sell, especially under the name of Streelers. Feel free to share this pattern, but link to my blog or the pattern card on Ravelry.

Thank you and Enjoy!
~Jeannie

Thursday, August 13, 2009

Dishcloth Swap!

I know, I know... Seems like I'm all about the swap lately. Well, get used to it! lol To me there's just something wonderful and amazing about the communal exchange of friendship inherent in a gift swap of any sort. I really think, even beyond the greed, that this connection to another person obtained through gift giving, is what makes Christmas an exciting wonderful time, even if you're not Christian. I, for one, absolutely LOVE giving gifts, and it's my favorite part of the holidays. I like seeing people get excited. :)

So, I recently signed up for three more swaps groups on Ravelry: Knit & Crochet Dishcloth Swap, Ten Dollar Swap, and 12 Dancing Dishcloths. These are small exchanges, nothing extravagant, which means I get to be really creative on a budget, which is one thing I'm really good at. (For reference, see my mostly handmade bellydance wardrobe, ie the vest with the feather collar featured a while back.) And, I just sent out my first package for the first of these groups on Monday. It was for the Knit & Crochet Dishcloth Swap, and the overall theme was animals. We were asked to send our spoilee two dishcloths (knitted or crocheted, your choice) featuring animals.

Well, y'all know me, that's not quite enough of a theme, so when my spoilee suggested she likes sea creatures, I hit on the idea of doing a beachy package.

Photobucket

Photobucket

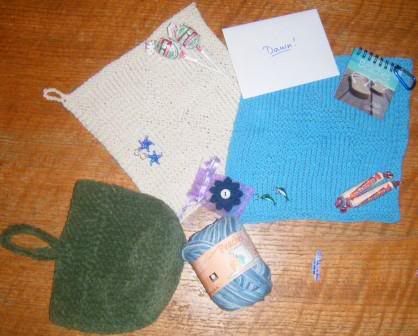
Here's what I sent:
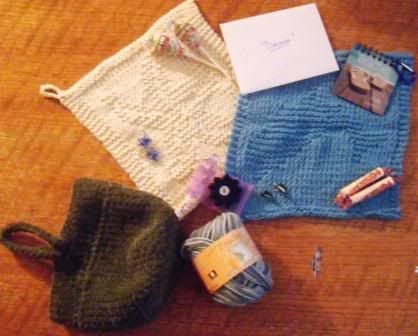
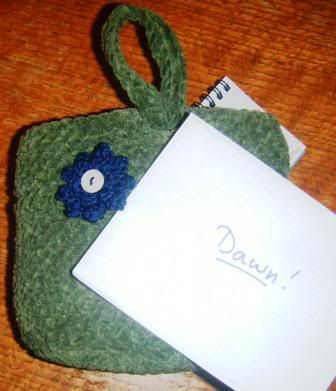
A "seaweed" project bag. I make these ALL the time, and I love them for small project bags. They are perfect for making dishcloths on the go because the strap fits easly around your wrist and you can literally stitch anywhere, anytime. It keeps everything nice and neat, and because this one can hold two balls of kitchen cotton, you can work on something a little more complex, if you'd like. I used a sueded yarn, in a nice sage, which not only matched the theme (seaweedy, yes?) but I thought it might be a color she'd enjoy as she likes pale, earthy colors. I wish I had a better pic; here it is with everything in it, ready to be sent on it's way:

Photobucket

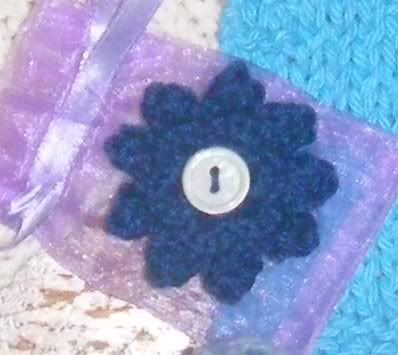
Attached to that, you can see a little "Sea Anemone Pin" I made. I am obsessed with fiber flowers and flower pins lately, so I knew I'd want to make one for my spoilee. This little pin can be used anywhere: hats, jackets, bags, scarves, shawls, anywhere! This picture above shows the color a bit better.

Photobucket

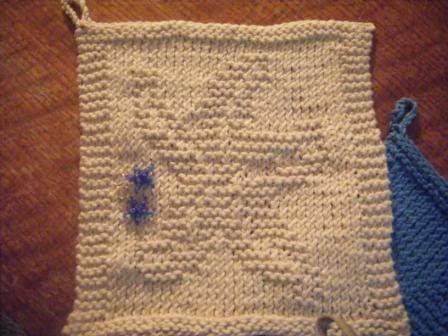
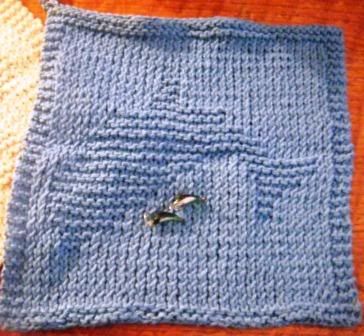
Of course, I made two animal-themed dishcloths. One is Sandy the Starfish, made in an ecru cotton to mimic a starfish lying in the sand. The other is Daphne the Dolphin, swimming through deep blue waves. Sand and sea... a little surf and turf, yes? ;) I couldn't find any projects in crochet that I felt really worked with the theme I was going for, so I knitted the cloths. It's been quite a while since I knitted anything, and it was so fun! I flew through these so much faster than I expected to. I think crochet has given me alot more fiber confidence, so my knitting is benefiting, too. Here are the cloths, up close:

Photobucket

Photobucket

You can see on each one that I also made some stitch markers to go with them. There are two blue starfish and two green dolphins. Also included was a little clip-on calendar featuring beach scenes, some treats for my spoilees boys, and a card to explain it all. Fate put me together with the same person I got to spoil for the Reducio Sock Swap last time, and it was nice to get to send her things that weren't HP themed, but that I thought she might still enjoy. She has two boys, like I do, though both of mine are December babies. May/December friendship? LOL I hope she enjoys everything as much as I've enjoyed making it for her!

BB!
~Jeannie

Friday, August 7, 2009

The Southern Mirage is Coming!!


Alchemy Middle Eastern Dance Troupe is proud to present the second annual Southern Mirage!

October 3rd and 4th, 2009; save the date!

We are thrilled to be featuring MIRA BETZ in a two-day workshop extravaganza and our in our gala show on Saturday evening. Please see our website for more information: www.alchemydance.com or go directly to our registration page: southernmirage2009.eventbrite.com/. If you would like to know more about Mira, please check out her website: www.miramania.com/ or tribe: tribes.tribe.net/mirabetz. If you don't know Mira, trust us, you WANT to know Mira! A beautiful performer who dances with the soul of tradition while flirting with the spirit of innovation, Mira emphasizes technique and form outside of the restrictions of style and genre, making her an invaluable teacher and artist whose experience benefits everyone she touches.


This year the theme is the misty realm of fairy tales, showcasing everything from the cute to the creepy, from the beautiful to the bizarre. Enter a land of Other with us. If you would like to participate in Alchemy's first fully-themed show, please contact Jeannie at troupe@alchemydance.com for more information.

Venue Locations

Workshops will be held at:
The Augusta Ballet School
2941 Walton Way
Augusta, GA 30909

Gala show will be at:
Le Chat Noir
304 8th Street
Augusta, GA 30901

Recommended Accommodations:
Quality Inn
www.qualityinn.com/hotel-au...gia-GA312
1455 Walton Way
Augusta, GA 30901
Please note, we do not have any discounts available with this hotel. However, it is centrally located to the workshops and the show venue. The usual rate is great, they offer a free continental breakfast, and we house our instructors there when needed. So, in short, we think you'll like it! :)

Local Airport:
Augusta Regional Airport
ags.skyharbors.com/

Questions? Concerns? Please see our tribe, thesouthernoasis.tribe.net/ or email us at troupe@alchemydance.com.

BB!
~Jeannie

Sunday, August 2, 2009

TTMT - Talk to Me Tuesday

So, for those of you who don't know, Talk to Me Tuesday is an idea in which you post a vlog, or video blog, on Tuesdays. I've seen it on crafting blogs, so that may be where the phenomenon ends. But, I really like the idea, and I'm thinking of trying it if not this week then maybe next. Sometimes I may include tutorials for crafting, or maybe just some finished projects. Other times I might talk about what my dance troupe is up to or include a mini-bellydance lesson. We'll see how it goes. ::fingers crossed::

BB!
~Jeannie